XML Schema Definition creation: Journal - Part 2: XSD file with <oXygen/> XML Editor
In the first part of this series I had outlined a sample layout that I wanted to use for a series of XML files that I would be creating over the course of 2010.
This time I'm going to create the actual XML Schema Definition file with <oXygen/> XML Editor, version 11.1.
I've been using <oXygen/> since January 2008, and wouldn't trade it for any other XML editor.
If you don't have <oXygen/> you can still follow along. The finished product is available online and as you follow along you'll get a sense of what the tool is doing. A trial version of the application is also available.
Download/view the Journal XML Schema Definition.
Creating an empty XSD in <oXygen/>
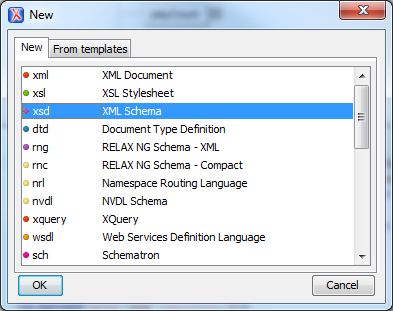
After starting <oXygen/> select File > New... and select xsd - XML Schema (Figure 1).
At this point we won't select/enter a Target namespace, and will use the default xs prefix and appropriate namespace, as shown in Figure 2.
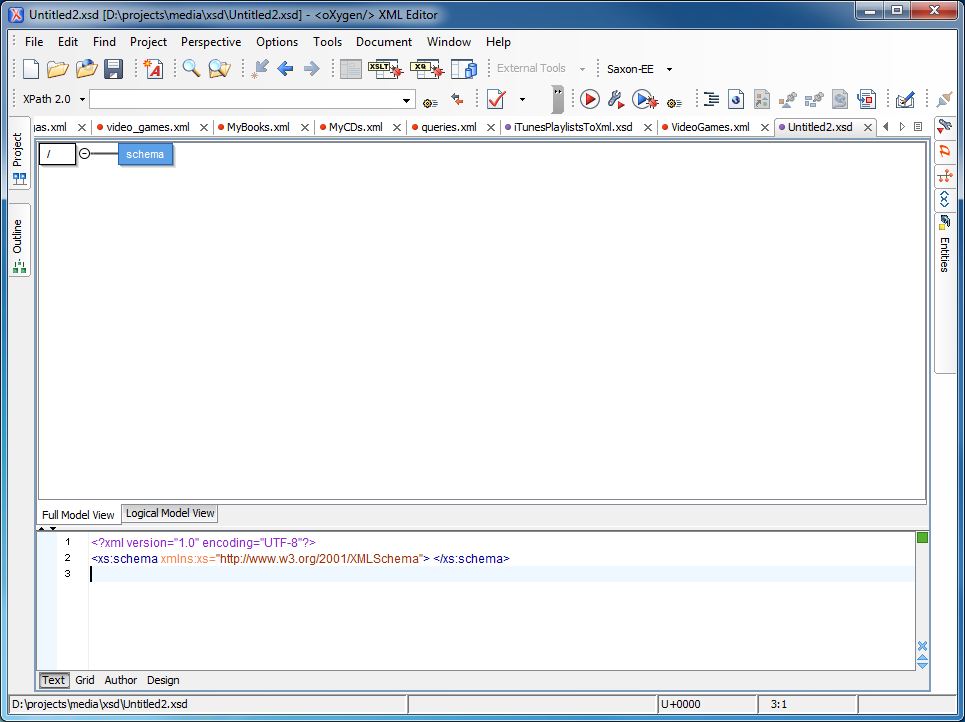
Once we have a new file created, select the 'Text' 'tab' in the bottom left-hand corner of the application. This gives us a model view as well as the XML behind the model, as shown in Figure 3.
12/23/2009: While working on the next part of this series I realized that I was wrong to have the elements and attributes camel case, instead of Pascal case. The XSD has been updated, but the guide has been left as it was created. Just uppercase the initial character and you'll be fine. Or leave it as is. Actually, I have no idea what I'm talking about.
Filling out the XSD
Now that we have a model, we can start creating our schema definition graphically. We'll start at the top, with the root element.
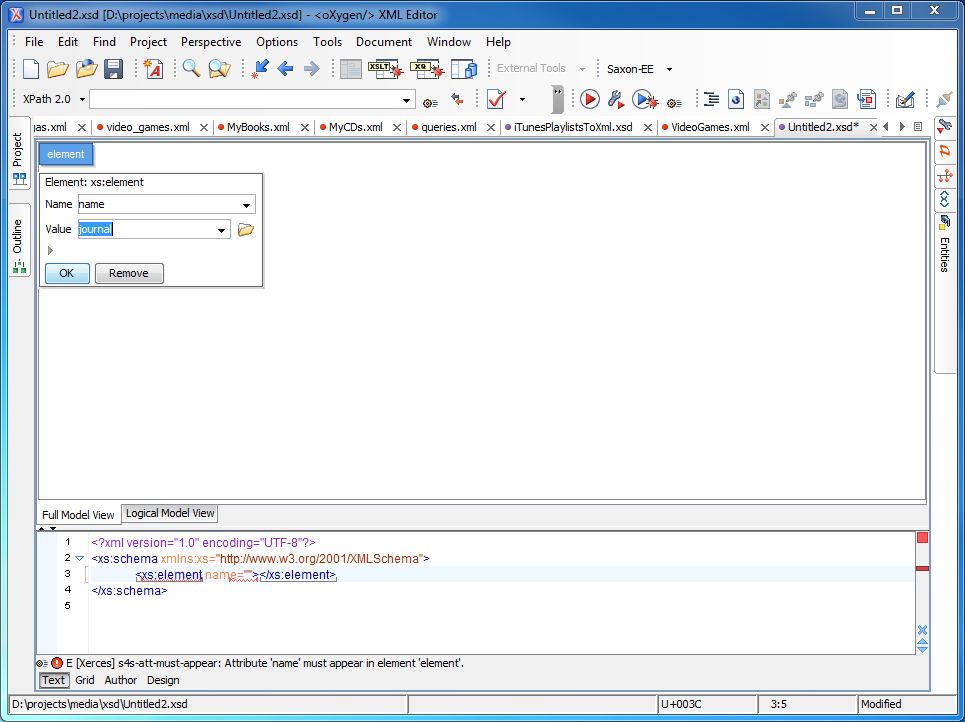
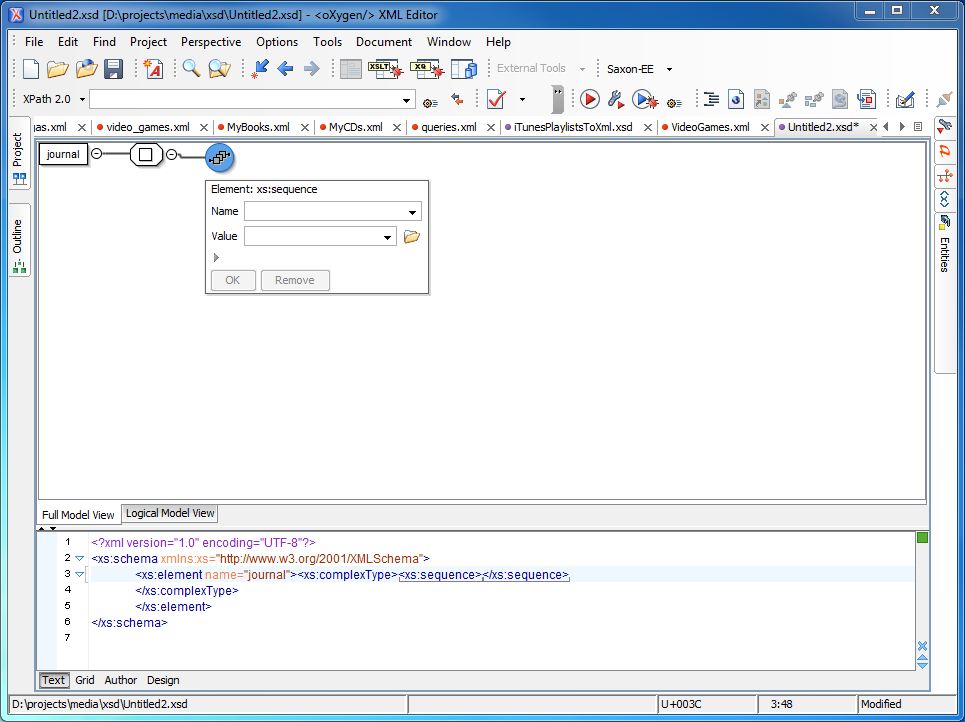
Right-click on the schema box and select Append child > xs:element. Make sure the name is set to Name and enter "journal" as the Value. (Figure 4.) Press OK. Note that the text version is also updated accordingly. As you make changes, try to pay attention to what happens below. Luckily, the interface is pretty obvious, adding explanatory text to the standard items. It will also highlight where errors are, as they arise.
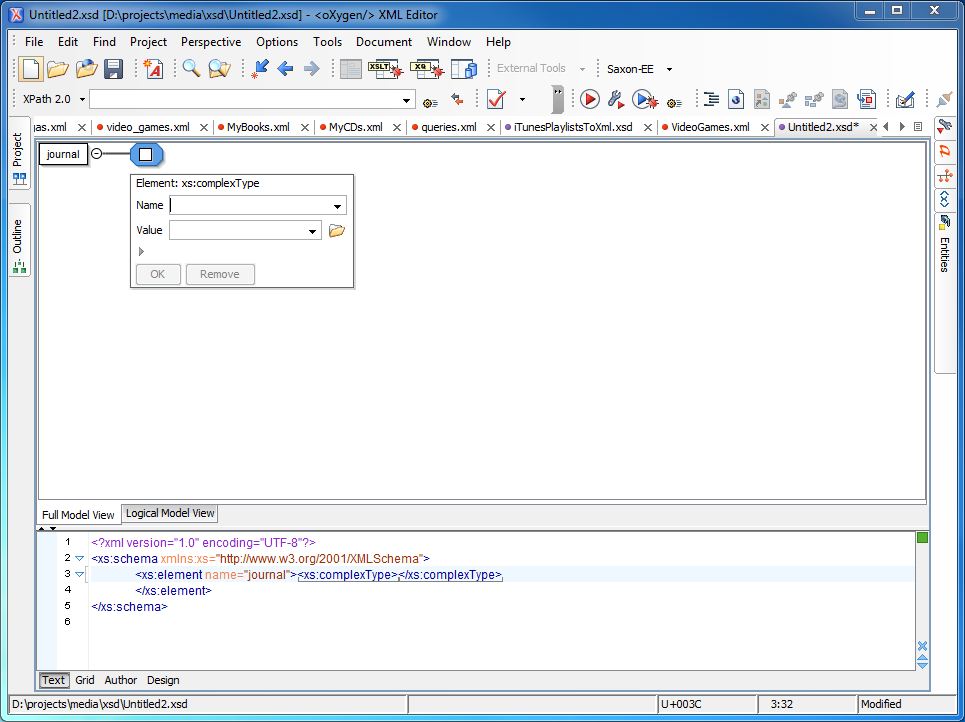
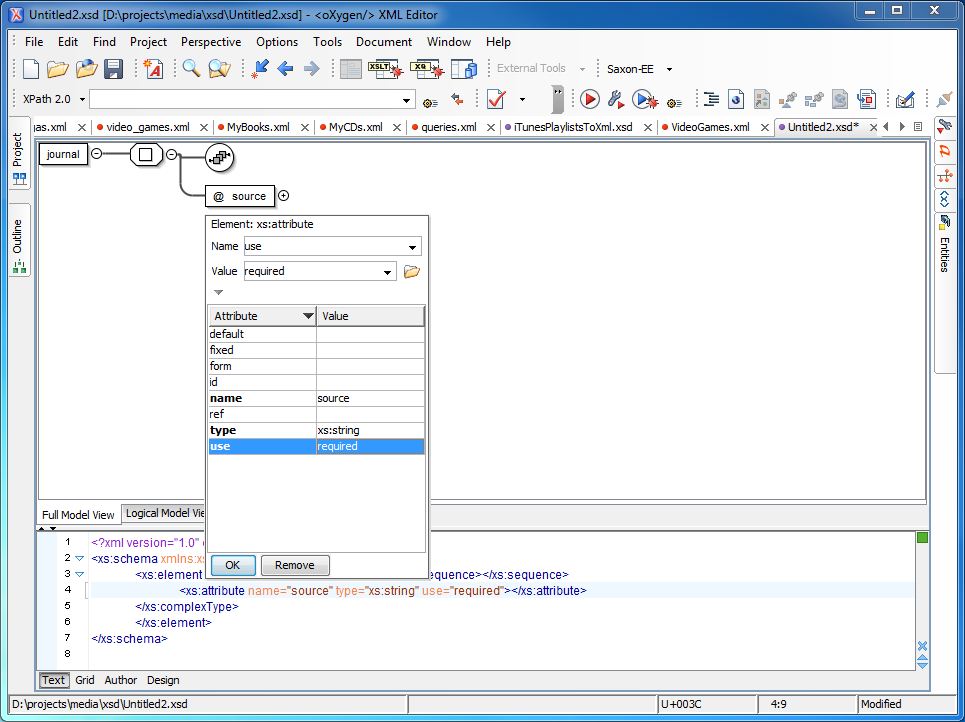
Since we've got an attribute to add to the journal element, as well as an entry element, we'll next add these. Right-click on journal, select Append child > xs:complexType, leaving everything blank (Figure 5). Right-click on this new item (a 'box') and select Append child > xs:sequence. Again, leave everything blank (Figure 6). Right-click on the 'box' again and select Append child > xs:attribute. This time we'll expand the box using the arrow and change the name (to source), the type (to xs:string), and the use (to required) as shown in Figure 7.
Now our journal element is finished, but we need to add the entry element and its attribute and children elements.
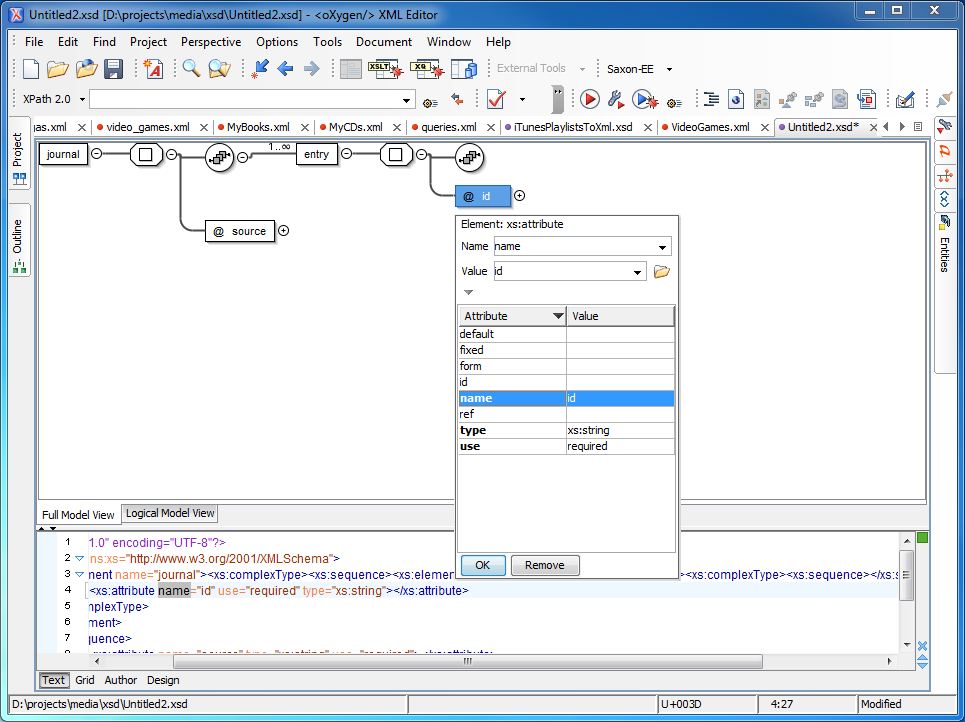
Right-click on the icon of three boxes (added when we added an xs:sequence above) and select Append child > xs:element. Name is entry and maxOccurs is unbounded, since this element can repeat any number of times. (Figure 8.)
Repeating what we did before, we'll right-click on entry and select Append child > xs:complexType, leaving everything blank again. Right-click on this new item and select Append child > xs:sequence, again leaving everything blank. Right-click on the box again (the xs:complexType) and select Append child > xs:attribute. Giving this a name of id, a type of xs:string, and use of required we end up with something like Figure 9.
Now we're at a point where we have more than one element at the same level, but some also have children. Luckily, we already know what to do to finish this up.
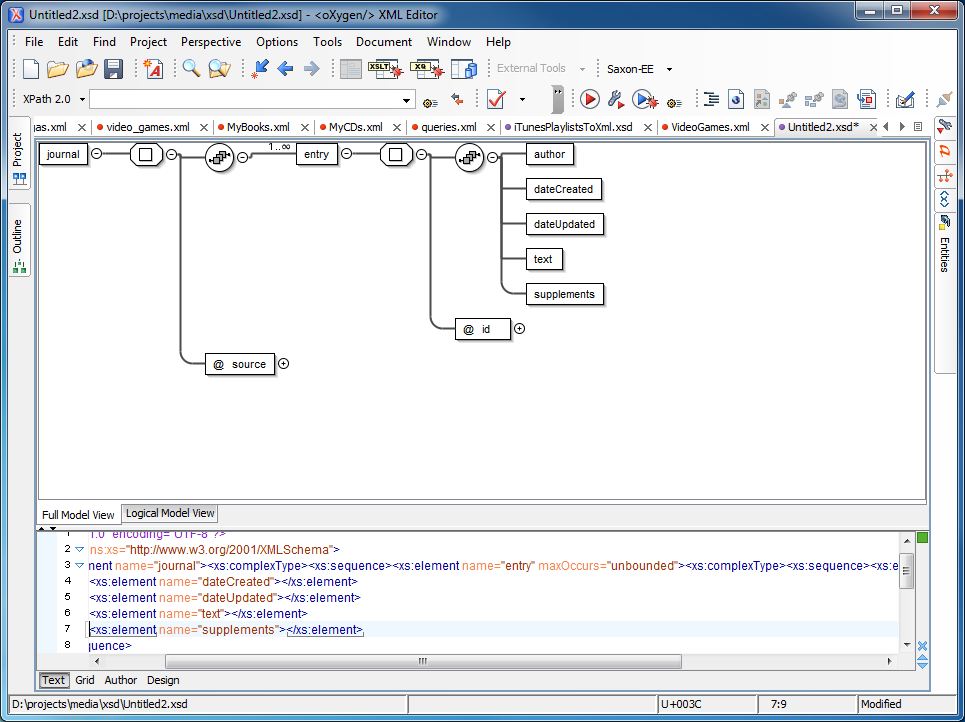
Right-click on the three boxes (above the id attribute) and select Append child > xs:element five times. Once all five are created we can update the names accordingly, until we have Figure 10. A sequence states that the items must appear in a particular order, 0 or more times. So just follow the sample layout as you name, which determines how they must appear in the XML document.
The author element has an element within it, so we'll do our now standard of right-clicking on it and Append child > xs:complexType then Append child > xs:sequence on the new item. Finally Append child > xs:element, giving it a name of name and type of xs:string. See Figure 11 for this final step.
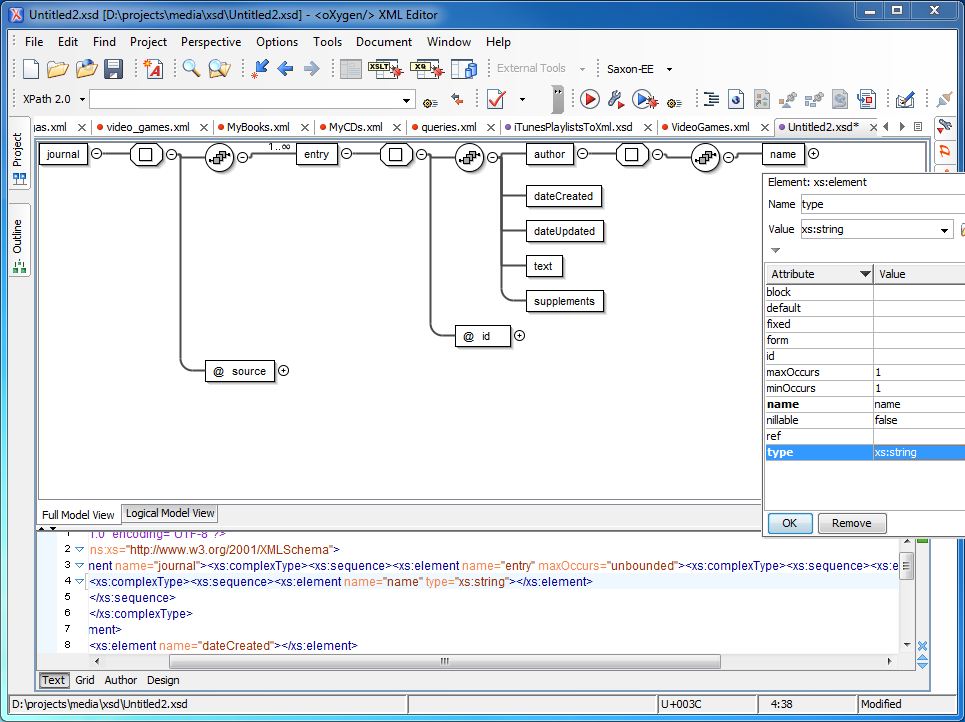
Double click on dateCreated, then dateUpdated, changing the type of both to xs:dateTime. Then change the nillable value of dateUpdated to true. See Figure 12. Contrary to the figure, based on our initial layout we want dateCreated and dateUpdated to be the same initially, so it should actually never be null. You can remove this attribute by double clicking on the item in model view and removing it there (right-click in the appropriate Attribute cell and select Remove) or by removing it from the XML itself.
Finally double click on text and change the type to xs:string.
Now we'll repeat the complexType/sequence additions a couple more times. Right-click on supplements and append an xs:complexType, xs:sequence and xs:element, with a name of supplement. Right-click on supplement and again append an xs:complexType, xs:sequence, two xs:element, and an xs:attribute on xs:complexType (the single box). This gives us Figure 13.
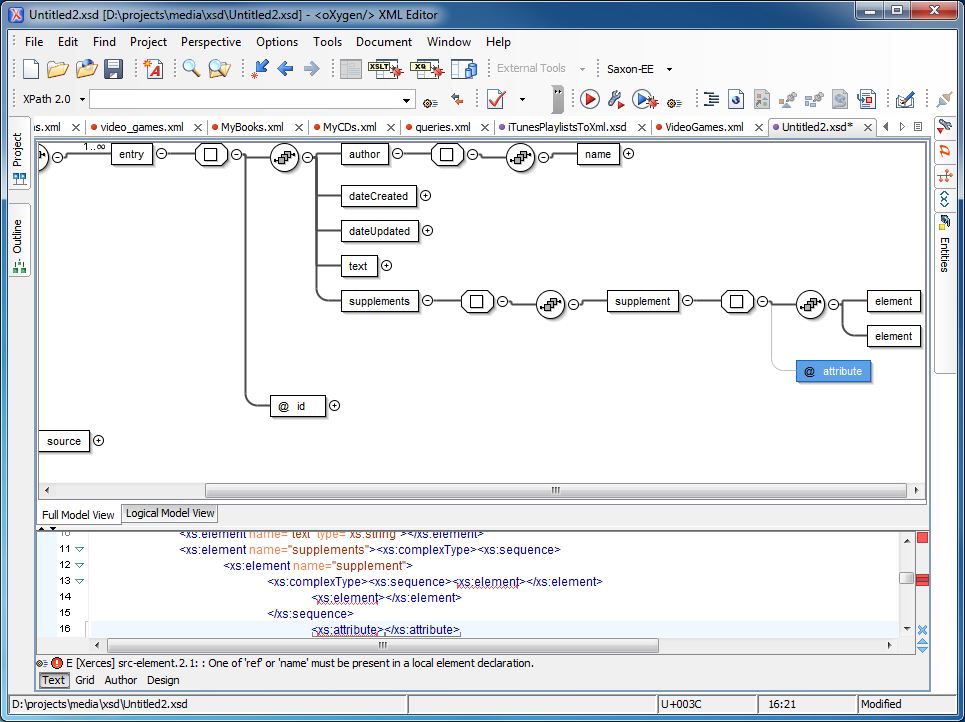
The first element name is dateAdded, type is xs:dateTime. The second element name is text, type is xs:string. Attribute name is id and type is xs:positiveInteger, with use of required.
You may have noticed another possible option. positiveInteger starts at 1 while nonNegativeInteger starts at 0. Per the rough schema we want to start at 1, and are therefore using the former.
Finally change maxOccurs on supplement to unbounded, since we want to allow multiple supplement elements. Figure 14 shows this and most of the last few changes we had made as well.
Save the file, calling it whatever you want. (I choose JournalSimple.xsd, as I can see expanding this to allow comments, for example.)
Validating the schema
<oXygen/> XML Editor has a tool to generate sample XML files from an XML Schema Definition (XSD). Select Tools > Generate Sample XML Files..., select an XSD file (will be the current XSD if you still have it open), choose the output directory, and run. In my case, that gave me an output like the following.
<?xml version="1.0" encoding="UTF-8"?>
<journal xmlns:xsi="http://www.w3.org/2001/XMLSchema-instance"
 xsi:noNamespaceSchemaLocation="file:/D:/projects/media/xsd/JournalSimple.xsd" source="source0">
	<entry id="id0">
		<author>
			<name>name0</name>
		</author>
		<dateCreated>2006-05-04T18:13:51.0Z</dateCreated>
		<dateUpdated>2006-05-04T18:13:51.0Z</dateUpdated>
		<text>text0</text>
		<supplements>
			<supplement id="50">
				<dateAdded>2006-05-04T18:13:51.0Z</dateAdded>
				<text>text1</text>
			</supplement>
			<supplement id="50">
				<dateAdded>2006-05-04T18:13:51.0Z</dateAdded>
				<text>text2</text>
			</supplement>
			<supplement id="50">
				<dateAdded>2006-05-04T18:13:51.0Z</dateAdded>
				<text>text3</text>
			</supplement>
		</supplements>
	</entry>
	<entry id="id1">
		<author>
			<name>name1</name>
		</author>
		<dateCreated>2006-05-04T18:13:51.0Z</dateCreated>
		<dateUpdated>2006-05-04T18:13:51.0Z</dateUpdated>
		<text>text4</text>
		<supplements>
			<supplement id="50">
				<dateAdded>2006-05-04T18:13:51.0Z</dateAdded>
				<text>text5</text>
			</supplement>
			<supplement id="50">
				<dateAdded>2006-05-04T18:13:51.0Z</dateAdded>
				<text>text6</text>
			</supplement>
			<supplement id="50">
				<dateAdded>2006-05-04T18:13:51.0Z</dateAdded>
				<text>text7</text>
			</supplement>
		</supplements>
	</entry>
	<entry id="id2">
		<author>
			<name>name2</name>
		</author>
		<dateCreated>2006-05-04T18:13:51.0Z</dateCreated>
		<dateUpdated>2006-05-04T18:13:51.0Z</dateUpdated>
		<text>text8</text>
		<supplements>
			<supplement id="50">
				<dateAdded>2006-05-04T18:13:51.0Z</dateAdded>
				<text>text9</text>
			</supplement>
			<supplement id="50">
				<dateAdded>2006-05-04T18:13:51.0Z</dateAdded>
				<text>text10</text>
			</supplement>
			<supplement id="50">
				<dateAdded>2006-05-04T18:13:51.0Z</dateAdded>
				<text>text11</text>
			</supplement>
		</supplements>
	</entry>
</journal>
While not perfect, based on what we want, it's not too bad. And it shows us that we're on track, since the elements and attributes we wanted on items are there.
Next steps
At this point we've created our XSD. Is the series at an end? I suppose we'll find out if/once part 3 is released.
Search
Links of Note
Support This Site
If my blog was helpful to you, then please consider visiting my Amazon Wishlist.